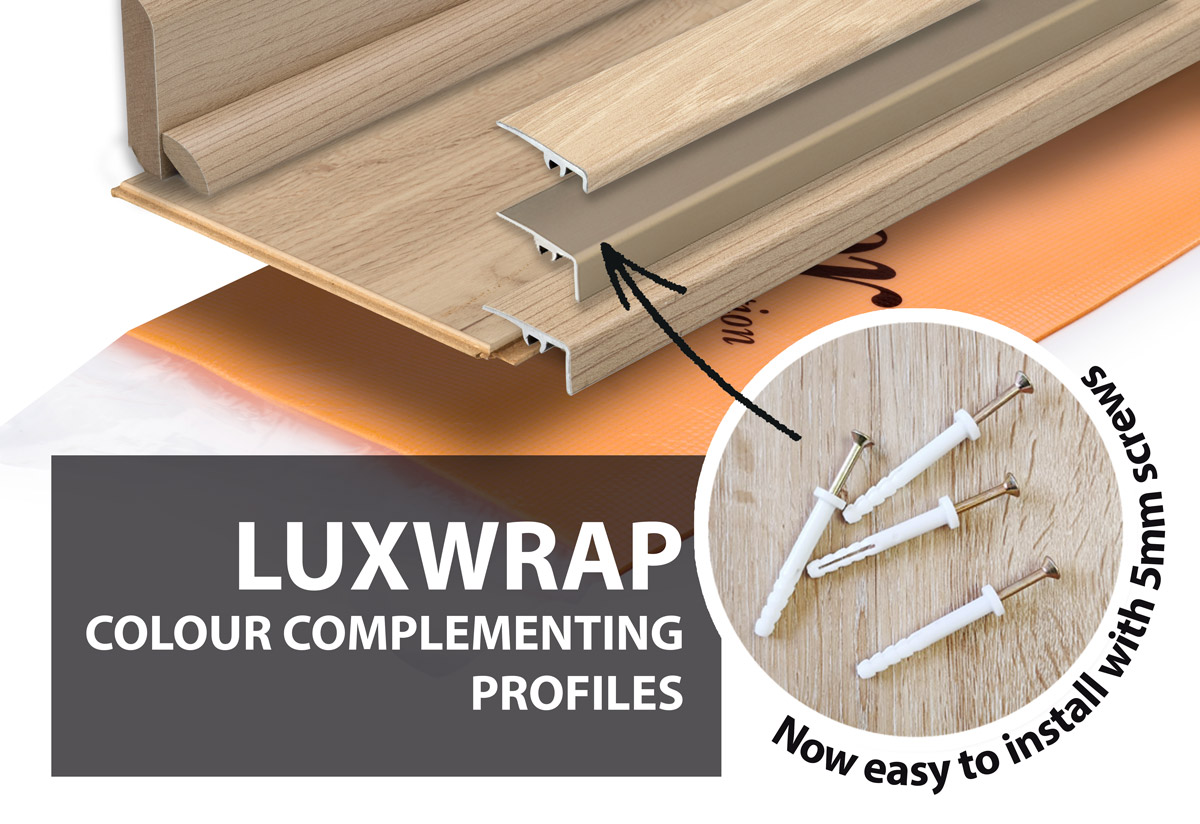
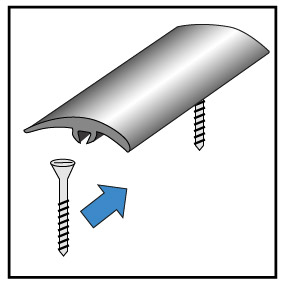
In architectural finishes, ease of installation is just as important as design and durability. That’s why we’re excited to introduce the new Aluminium LUXWRAP profiles, designed to simplify your projects. A key innovation is the switch to standard 5mm screws for mounting, eliminating the need for specialised hardware.
Why This Change is a Game-Changer:
No Specialised Hardware Needed
Forget about delays and added costs from searching for specific mounting pins. With standard 5mm screws, easily available at any hardware store, installation is quick and straightforward, even in remote locations or on tight timelines.Simplified Installation
Whether you’re a seasoned professional or a DIY enthusiast, the 5mm screw system is intuitive and easy to use. No special tools are required, and you can place anchor points wherever needed along the profile.Greater Accessibility
The widespread availability of standard screws means fewer delays and less hassle sourcing parts, allowing you to complete projects faster and more efficiently.Versatility Across Projects
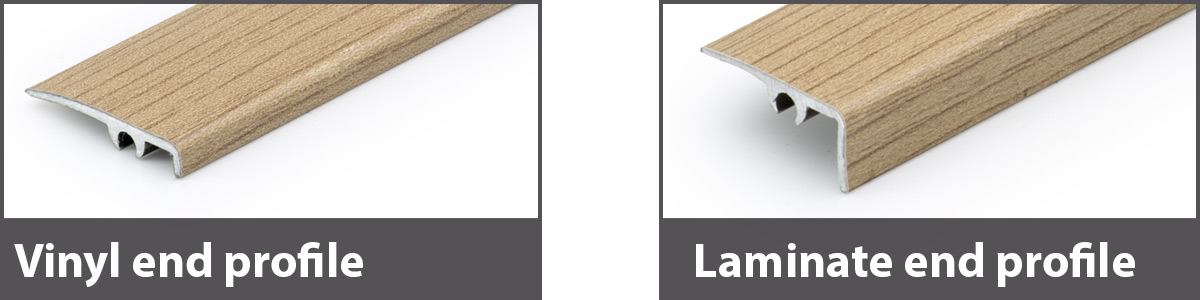
These profiles are suitable for a variety of applications, including both laminate and vinyl flooring.
Aluminium Luxwrap Step-by-Step Installation Instructions:
1. Prepare the Surface: Ensure that the flooring where the profile will be installed is clean, dry, and level.
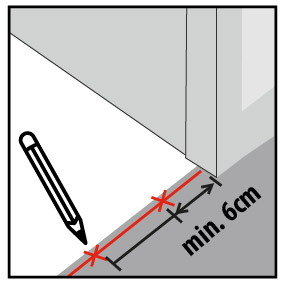
2. Measure & Cut the Profile: Measure the length of the area where the profile will be installed. Mark the measurement on the aluminum profile with a pencil or marker. Use a hacksaw or a chop saw with a metal-cutting blade to cut the profile to the required length.
Tip: Ensure the cut is clean and straight to ensure a neat installation.
3. Test Fit: Place the cut aluminum profile into position to ensure it fits properly along the flooring edge.
4. Secure the Profile with screws:
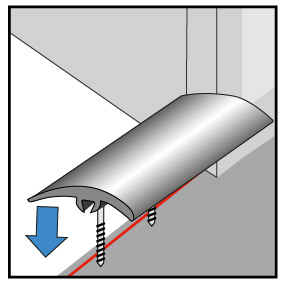
- Mark where the screws will be placed along the profile. These marks should be evenly spaced.
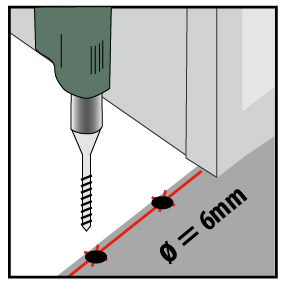
- Drill pilot holes into the subfloor
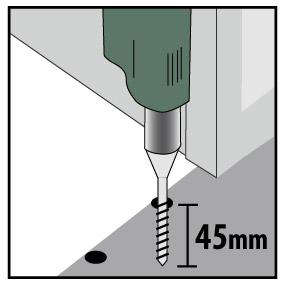
- Align the profile in its final position and secure it with screws
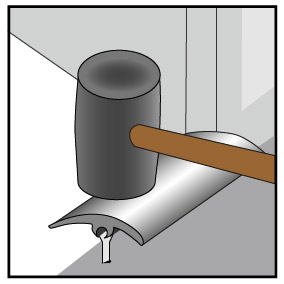
- Gently tap the profile down
5. Final Touches: Once the profile is secured, ensure it is level and flush with the adjacent flooring materials. Clean the profile with a soft cloth to remove any fingerprints, dust, or debris.
Key Benefits:
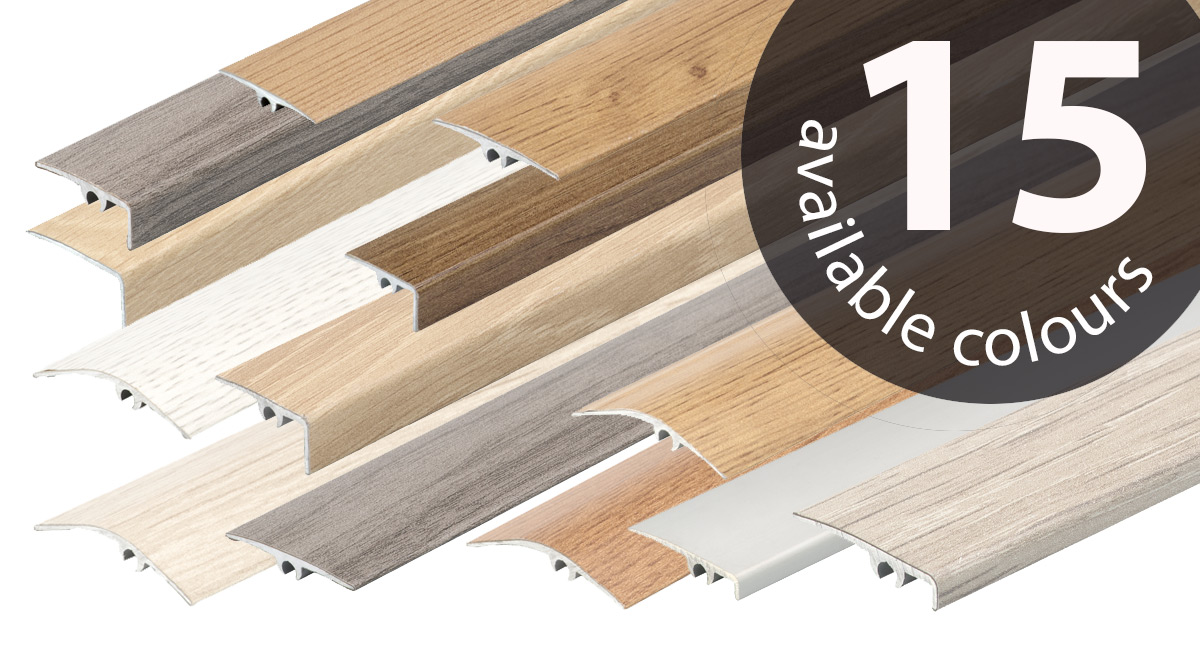
- Wide selection of colour-complementing profilesA huge advantage of LUXWRAP profiles is the extensive range of colour options available, allowing for perfect colour matching between the profiles and the flooring you’ve installed. This ensures a cohesive and professional finish for any project.
- Cost-effective and accessible 50mm screws used for fitting
- Versatile for use with both laminate and vinyl flooring, with 2 end profiles available for the varying floor heights of laminate (>8mm) and vinyl flooring(<6.5mm)
- Consistent quality and enhanced durability
Aluminium LUXWRAP profiles make it easier than ever to achieve a polished, professional finish in any project—whether commercial or residential. With a wide range of colour options, you can transform any space effortlessly while maintaining high design standards.